An admin of Outlook at your company, you can deploy the Bucketlist add-on to your team’s Outlook company wide, provided you meet the below requirements:
If the user is connected to Microsoft 365 or Outlook.com, mail server requirements are all taken care of already.
Microsoft 365 or Outlook.com centralized add-in instructions:
Centralized add-in requirements:
Centralized add-in deployment:
Determine if Centralized Deployment of add-ins works for your organization:
Deploy adds-ins in the admin center:
On-Premise installations mail server requirements and add-in instructions:
For users connected to on-premises installations of Exchange Server, the following requirements apply.
The server must be Exchange 2013 or later.
Exchange Web Services (EWS) must be enabled and must be exposed to the Internet. Many add-ins require EWS to function properly.
The server must have a valid authentication certificate in order for the server to issue valid identity tokens. New installations of Exchange Server include a default authentication certificate. For more information, see Digital certificates and encryption in Exchange 2016 and Set-AuthConfig.
To access add-ins from AppSource, the client access servers must be able to communicate with AppSource.
For on-premises with Exchange Admin Center:
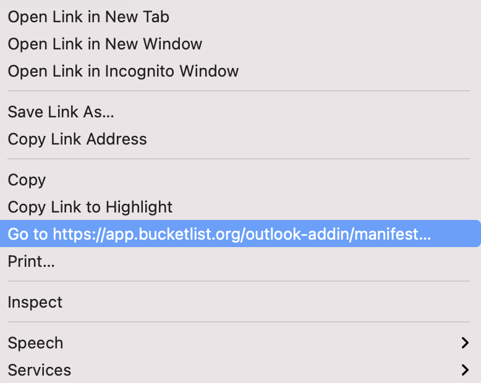
1) Download the manifest.xml file: https://app.bucketlist.org/outlook-addin/manifest.xml
right click the above link click "Go to https://app.bucketlist.org/outlook-addin/manifest.xml " to access the manifest

2) Log in to the Exchange Admin Center (EAC) and select organization > add-ins.
3) Select the add icon (+) and then Add from file.
4) Browse to the manifest XML file and then select Next.
5) Double click the BucketlistRewards add-in to edit it.
6) Select Make this add-in available to users in your organization.
7) Select either Optionally, enabled by default or Mandatory, always enabled depending on your needs.
.png?height=120&name=full%20logo%20-%20DB%20(1).png)