OKTA / SAML SSO Integration
Guide to setup SAML SSO Integration
Information needed to complete the integration:
- Single sign on URL
US Server: https://<COMPANY_SUBDOMAIN>.bucketlist.org/saml2/acs/
CAD Server: https://.bucketlistrewards.ca/saml2/acs/ - Audience URI (SP Entity ID):
US Server: https://<COMPANY_SUBDOMAIN>.bucketlist.org/saml2/metadata/
CAD Server:https://<COMPANY_SUBDOMAIN>.bucketlistrewards.ca/saml2/metadata/ - Name ID Format: Email Address
- Application Username: Email
- Attribute Mappings:
- mail -> user.email (Name Format: Unspecified)
- cn -> user.firstName (Name Format: Unspecified)
- sn -> user.lastName (Name Format: Unspecified)
- Signature verifying certificate -> Request Bucketlist product team for the public key signing certificate
Information required to provide BucketlistRewards
Once you provide XML metadata, request Bucketlist product team to enable SAML SSO for the company.
Step by step guide for OKTA
This guide was last updated on September 16, 2022. The screenshots or steps may change over the time.
- Log into your OKTA admin and select "Applications" from left menu
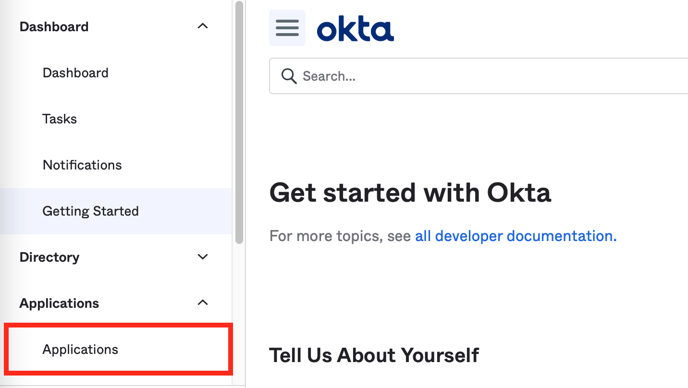
- Click on "Create App Integration" button

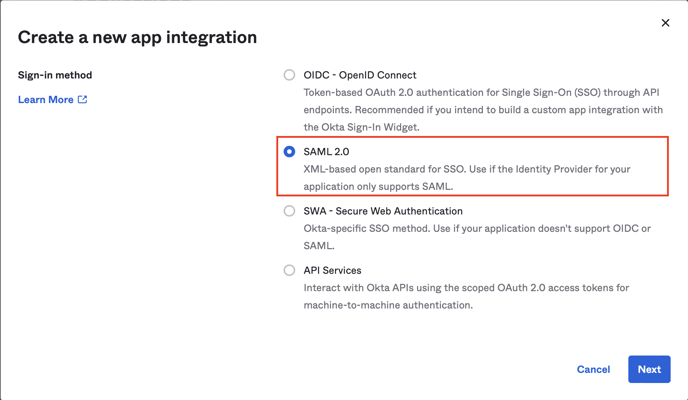
- In the create new app integration dialog, select "SAML 2.0" as Sign-in method and click the "Next" button.
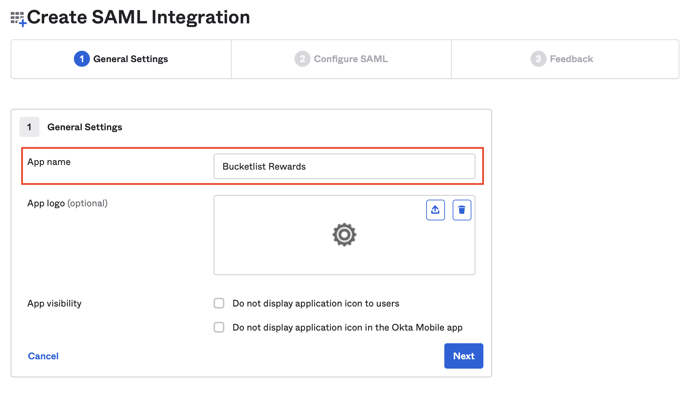
- On the first step of create SAML integration wizard "General Settings", enter app name "Bucketlist Rewards" and click "Next".
- On the second step of create SAML integration wizard "Configure SAML", update following fields:
- Single sign on URL:
US Server: https://<COMPANY_SUBDOMAIN>.bucketlist.org/saml2/acs/
CAD Server: https://<COMPANY_SUBDOMAIN>.bucketlistrewards.ca/saml2/acs/ - Audience URI (SP Entity ID):
US Server: https://company-subdomain.bucketlist.org/saml2/metadata/
CAD Server: https://company-subdomain.bucketlistrewards.ca/saml2/metadata/ - Name ID format: EmailAddress
- Application username: Email
Remember to replace "company-subdomain.bucketlist.org" with your company's Bucketlist subdomain.
Also, for steps a & b, please ensure there is a trailing slash at the end (/) as the SSO login will not work without this slash.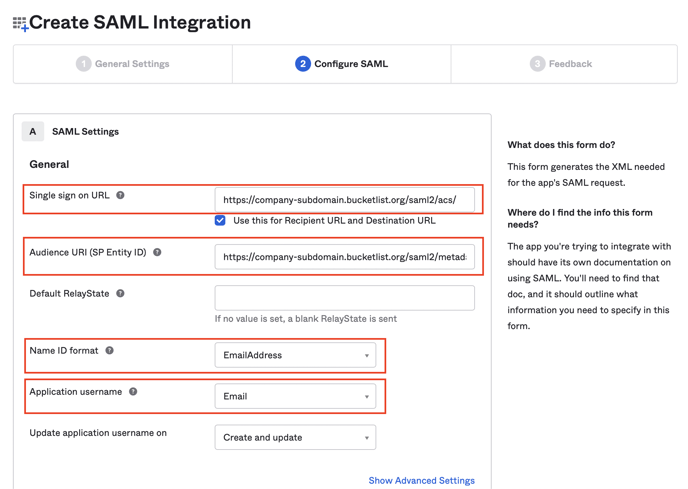
- Single sign on URL:
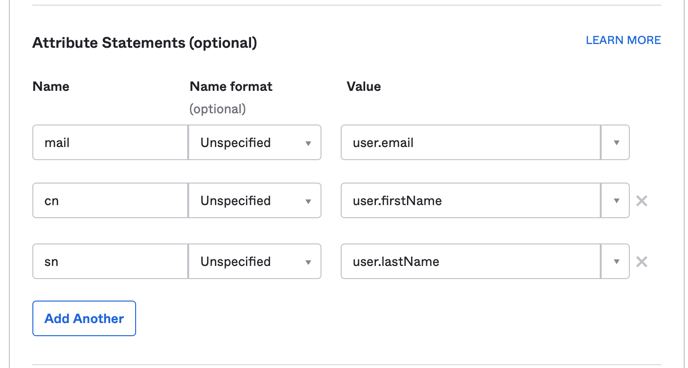
- For Attribute statements, add following mappings and press "Next"
Please note that the name format should be Unpecified
- mail -> user.email (Name Format: Unspecified)
- cn -> user.firstName (Name Format: Unspecified)
- sn -> user.lastName (Name Format: Unspecified)
- On the last step of create SAML integration wizard "feedback", select an appropriate option and press "Finish" to complete creating the SAML integration app.

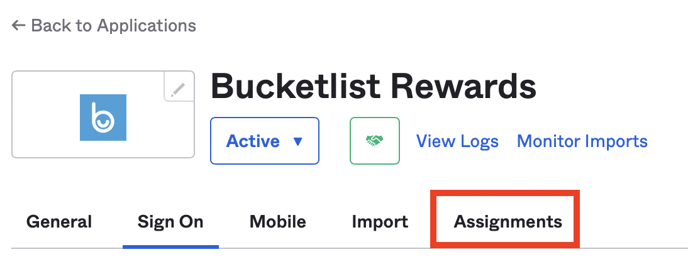
- Next we need to assign the newly created app to people in our company. Otherwise, they would not be able to use the app. Select "Assignments" tab from top navigation of the newly created app.
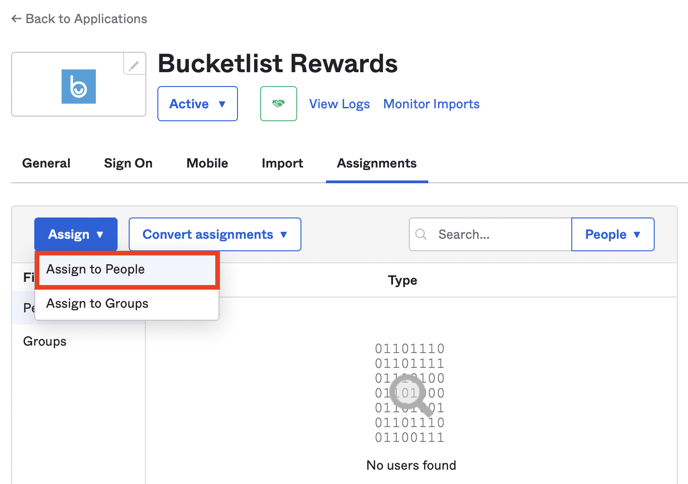
- Open the "Assign" dropdown and select "Assign to People". Alternatively, you can also assign the app to the groups.
- From Assign dialog, search for people from your company, and click "Assign" button in front of their name.

- Confirm that the "User Name" of the user is their email address and press "Save and Go Back".

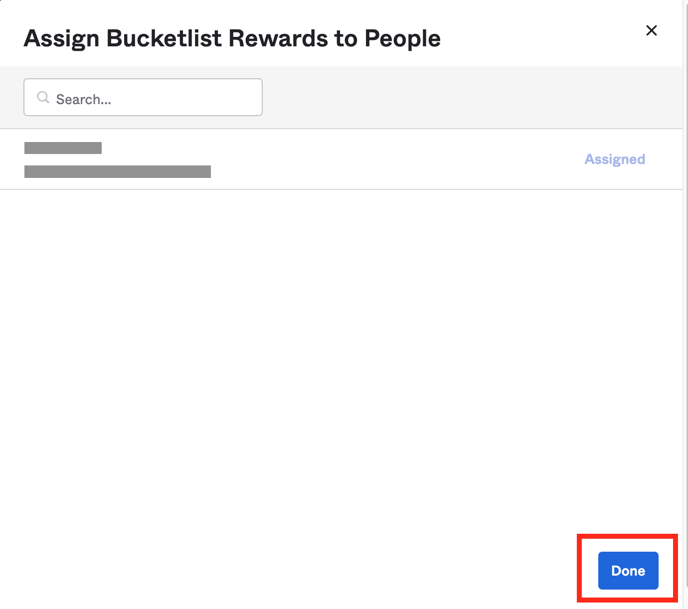
- Once done with all assignments, click the "Done" button to complete assign process.
- Now click on "Sign On" tab of the app.
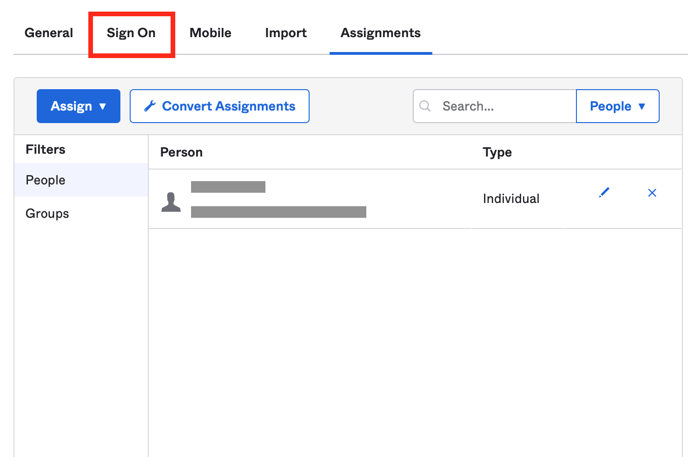
- In the right column, look for "SAML Setup" heading and the "View SAML setup instructions" button underneath that. Click the button.

- Scroll to the bottom of the "How to Configure SAML 2.0 for Bucketlist Rewards Application" page and copy the value of "IDP Metadata" under Optional heading. Share this metadata with the Bucketlist team.
Please make sure that you copy the complete metadata including everything between <?xml version="1.0" encoding="UTF-8"?> and </md:EntityDescriptor>.