Step 1 - Configuring an Application Group
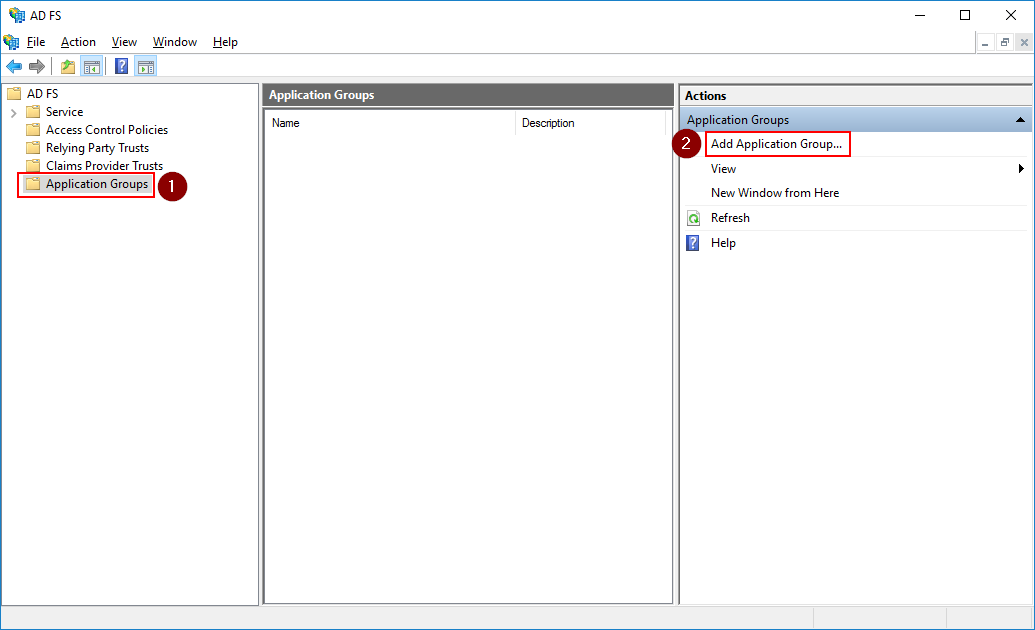
From the AD FS Management screen, go to AD FS ➜ Application Groups and click Add Application Group…

Fill in a name for the application group, select Web browser accessing a web application and click Next.

Make note of the Client Identifier value.
The Redirect URI value must match with your domain where your BucketlistRewards application is located. This should be something like https://<company-name>.bucketlist.org/adfs-oauth2/callback.
Note that if your platform is on bucketlistrewards.ca instead of bucketlist.org, you would use https://<company-name>.bucketlistrewards.ca/adfs-oauth2/callback

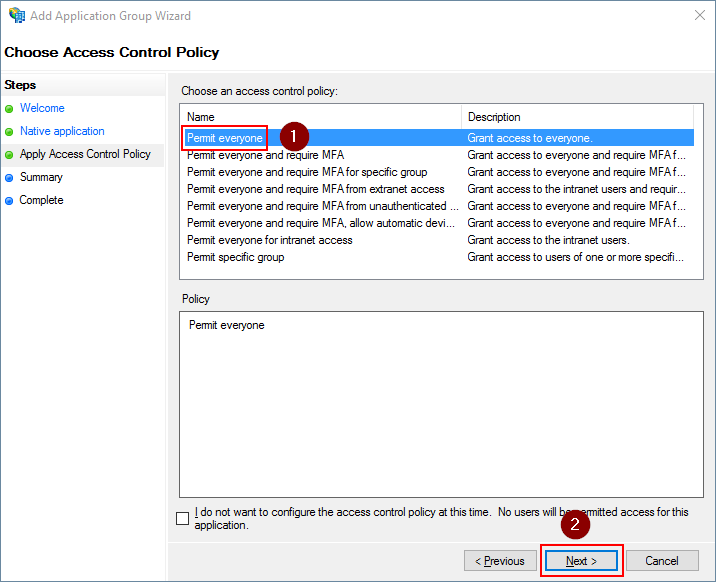
Select Permit everyone and click Next.

Review the settings and click Next.
Note that you will need to communicate us these values:
- The Client ID
- The Relying Party ID
While they both are the same in this screenshot, they can be changed independently from one another afterwards.

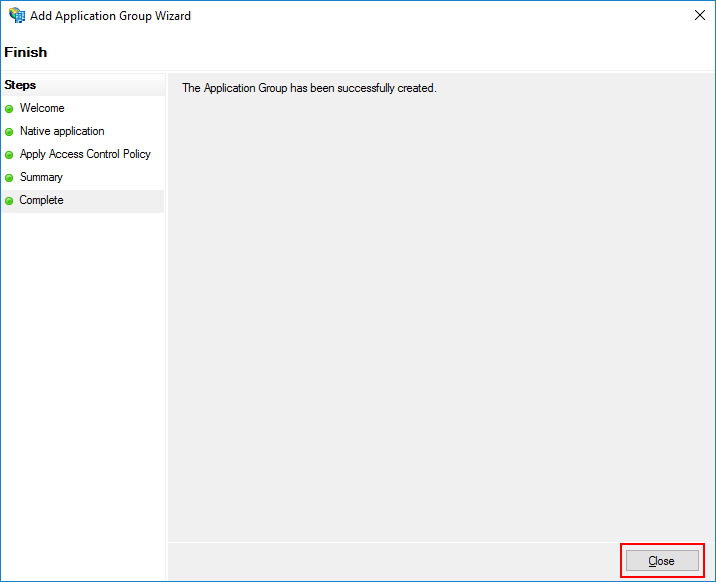
Close the wizard by clicking Close.

Step 2 - Configuring Claims
Open the properties for the application group we just created. Select the Web application entry and click Edit

On the Issuance Transform Rules tab, click the Add Rule button

Select Send LDAP Attributes as Claims and click Next
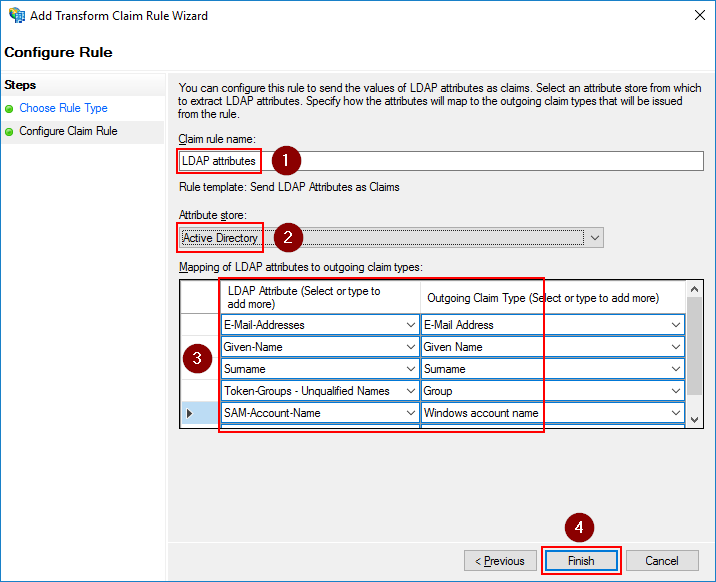
Give the rule a name and select Active Directory as the attribute store. Then configure the below claims.
| LDAP Attribute | Outgoing Claim Type |
|---|---|
| E-Mail-Addresses | E-Mail Address |
| Given-Name | Given Name |
| Surname | Surname |
| Token-Groups - Unqualified Names | Group |
| SAM-Account-Name | Windows Account Name |
 Click Finish to save the settings
You should now see the rule added. Click OK a couple of times to save the settings.
Once everything is configured, you can use the below PowerShell commands to determine the value for the settings you will need to provide to us:
- Client id
- Server
- Relying party ID and Audience
PS C:\Users\Administrator> Get-AdfsNativeClientApplication

Name                       : BucketlistRewards - Native application
Identifier                 : 487d8ff7-80a8-4f62-b926-c2852ab06e94      <<< CLIENT_ID <<<
ApplicationGroupIdentifier : BucketlistRewards
Description                :
Enabled                    : True
RedirectUri                : {http://web.example.com:8000/oauth2/callback}
LogoutUri                  :

PS C:\Users\Administrator> Get-AdfsProperties | select HostName | Format-List

HostName : adfs.example.com      <<< SERVER <<<

PS C:\Users\Administrator> Get-AdfsWebApiApplication | select Identifier | Format-List

Identifier             : {web.example.com}      <<< RELYING_PARTY_ID and AUDIENCE <<<
Enabling SSO for other browsers
By default, ADFS only supports seamless single sign-on for Internet Explorer. In other browsers, users will always be prompted for their username and password.
To enable SSO also for other browsers like Chrome and Firefox, execute the following PowerShell command:
[System.Collections.ArrayList]$UserAgents = Get-AdfsProperties | select -ExpandProperty WIASupportedUserAgents
$UserAgents.Add("Mozilla/5.0")
Set-ADFSProperties -WIASupportedUserAgents $UserAgents
After that, restart the ADFS service on every server in the ADFS farm.
For firefox, you’ll also have to change it’s network.automatic-ntlm-auth.trusted-uris setting to include the URI of your ADFS server.
Note: when testing after a config change is made, please test in new incognito window each time if things don’t appear to work
.png?height=120&name=full%20logo%20-%20DB%20(1).png)