When connecting OKTA for the first time with Bucketlist, you will need to provide some information on the Bucketlist integration section and create an application in OKTA.
Creating and configuring the application in OKTA:
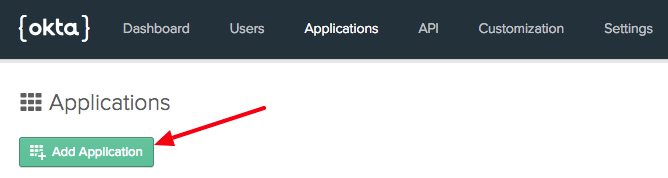
Create a new application using the 'Applications' menu and clicking 'Add Application'
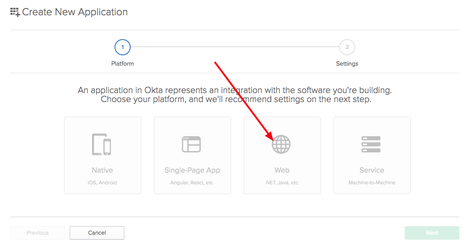
2. Choose 'Web', then click 'Next'
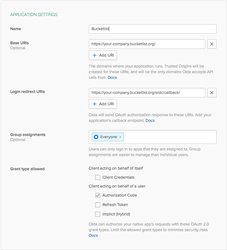
3. In the Application Settings screen, enter the following information
Name: Bucketlist
Base URIs:
If your platform is on the US Server and has the bucketlist.org URL then please use this Base URI: https://your-subdomain.bucketlist.org/
If your platform is on the CAD Server and has the bucketlistrewards.ca URL then please use this Base URI: https://your-subdomain.bucketlistrewards.ca/
Please note, your company may be located in Canada but your platform is on the US server. If you are unsure which server your platform is on, please check the end of your Bucketlist URL or connect with your Customer Onboarding Manager to confirm
Login redirect URIs:
If your platform is on the US Server and has the bucketlist.org URL then please use this Login redirect URI: https://your-subdomain.bucketlist.org/oidc/callback/
If your platform is on the CAD Server and has the bucketlistrewards.ca URL then please use this Login redirect URI: https://your-subdomain.bucketlistrewards.ca/oidc/callback/
Click 'Done'
4. In the 'General' section of the newly created app, add these settings (by clicking on 'Edit')
Logout redirect URIS:
If your platform is on the US Server and has the bucketlist.org URL then please use this Logout redirect URIs: https://your-subdomain.bucketlist.org/
If your platform is on the CAD Server and has the bucketlistrewards.ca URL then please use this Logout redirect URIs: https://your-subdomain.bucketlistrewards.ca/
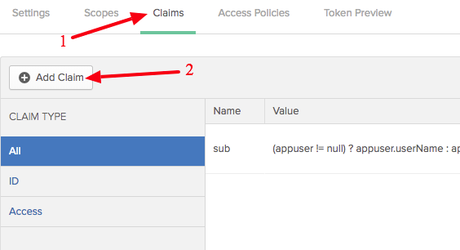
The claims are used to set the user's first and last name after the first login, depending on your configuration. If you already have a source where your user list is coming from, you might not need these.